This article is dedicated for the beginners who are looking to install WordPress on their system and take the benefits of best open source blogging tool.
In this article, I’ll let you know how you can install WordPress on your localhost. I am assuming that you already have installed the XAMPP on your PC (Windows Operating System). But you can use any other web server of your choice (like WAMP) to install WordPress.
If you are new to WordPress, don’t know about WordPress. Please read my other articles as mentioned below:
What is WordPress
Roles & Capabilities of WordPress
How To Start A Blog
Table of Contents
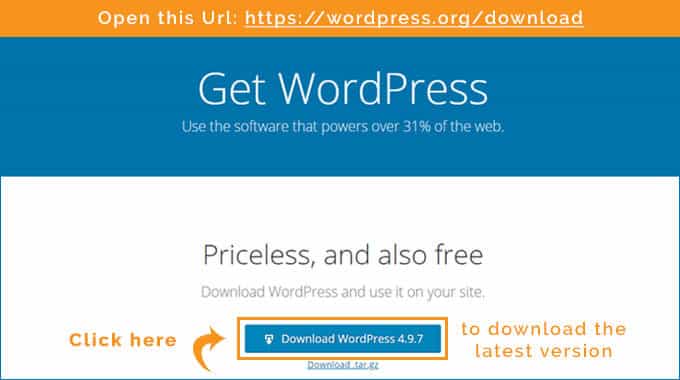
Step 1 – Download the WordPress:
First of all, you have to download the latest version of WordPress. To do that, please click on the “Download WordPress” Link after visiting the URL https://wordpress.org/download, as shown on the below images.
Step 2 – Create the Database:
After downloading the WordPress as mentioned above, you have to create the database as mentioned below. To do that, please open the chrome browser (Or any other installed browser) and enter the URL (http://localhost/phpmyadmin) as shown on the below image
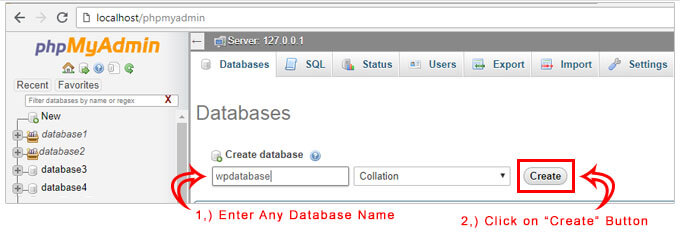
Please keep ready the database details like Database name, username, password and host details.
In our case, our database details are:
- Database Name: wpdatabase (you can create the database as you want as shown above)
- Database Username: root (Default: root)
- Database Password: — (Default: empty/blank) – But depend upon the installation/configuration of the xampp server.
- Host name: localhost (As we are installing/setting up WordPress on our local host)
You will need this details in the coming steps.
Note: Make sure your Apache & MySql are running as shown in below image:
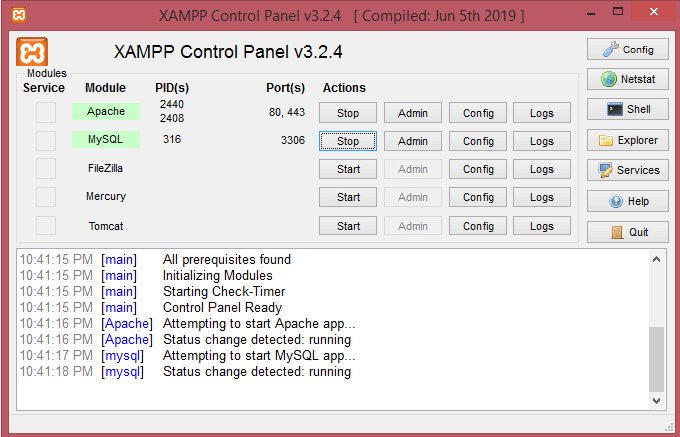
Step 3 – Open the Folder Where You Have Installed XAMPP:
Default Path: C:\xampp\htdocs
Create a new folder like “projectname” (you can choose any name as you want) and extract the Zip file (Latest version of WordPress) in the folder you created. Your file structure should be as mentioned in the below image:
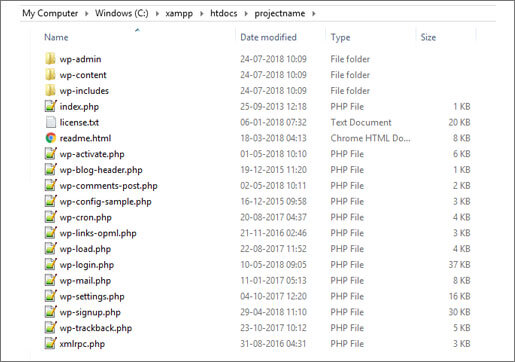
Now, in your browser, open the following URL – http://localhost/projectname/
It will automatically take you to the URL: http://localhost/projectname/wp-admin/setup-config.php
There you have to select the language you want to install the WordPress.
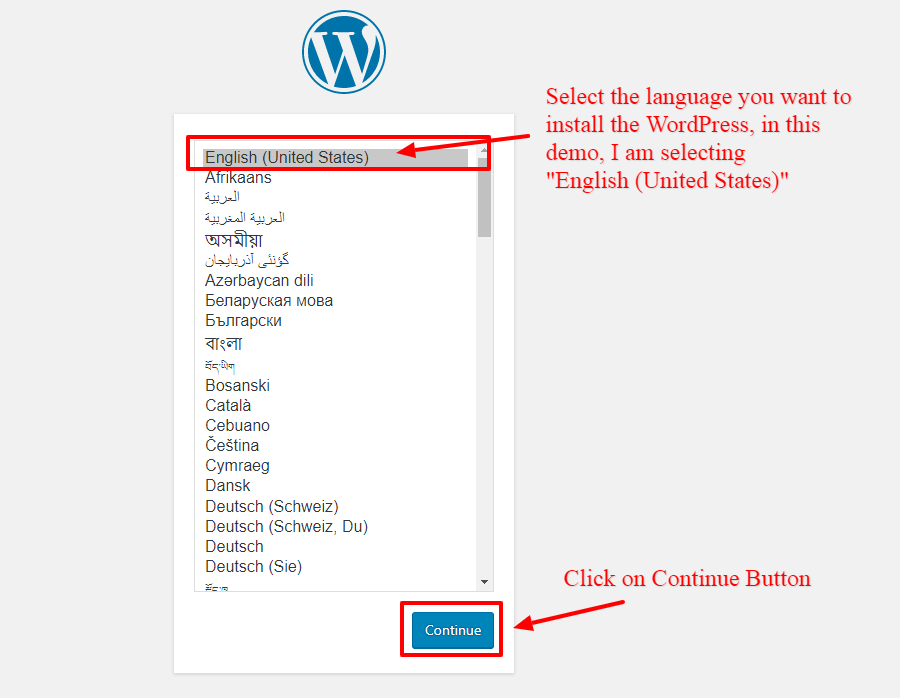
Step 4 – Enter the Database Details:
Then in the next step, you have to ready your database details (As told you earlier) like database name, username, password and host details.
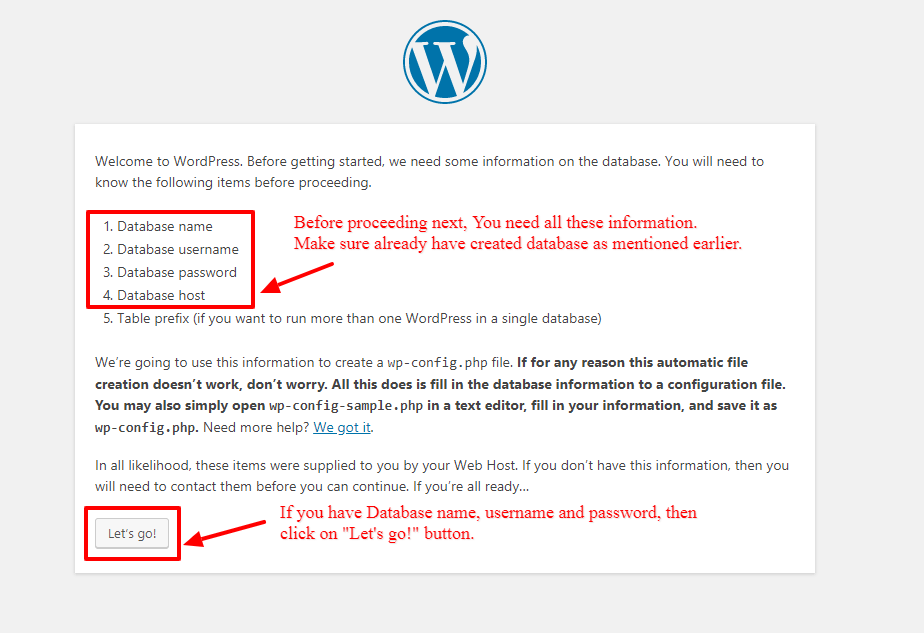
If you are ready with database name, username, password then click on “Let’s go!” button. Next step will be shown as below:
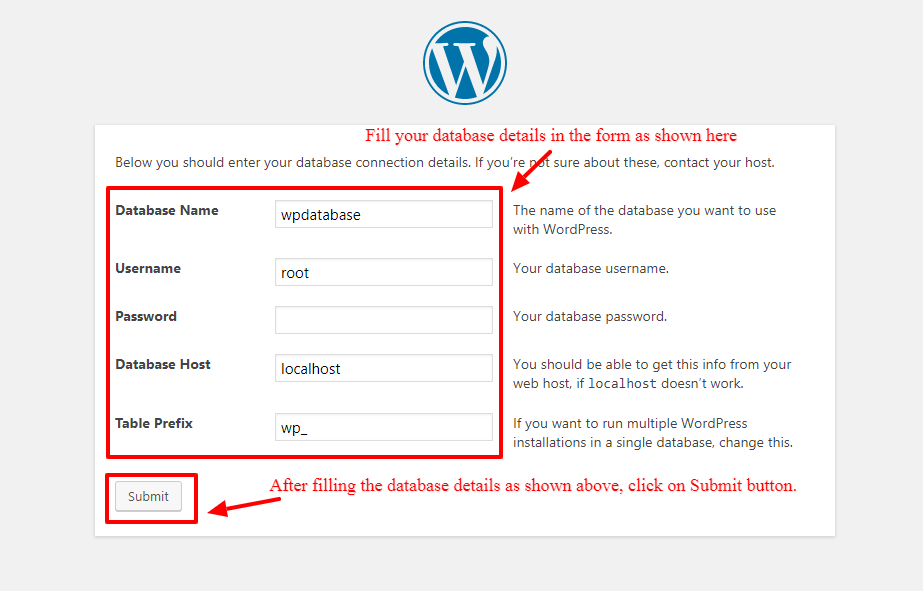
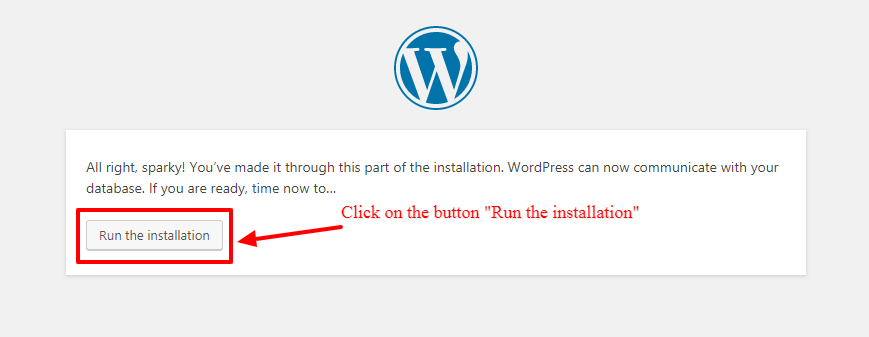
After filling the form and clicking on the submit button, you will get the screen as shown below, that means we are ready for installing WordPress on our localhost.
Step 5 – Enter the Site Details:
In the next step, you have to enter the Site title, admin username and password, that you need to access the WordPress dashboard. Please fill the information like username and password, mail id, that you can remember easily.
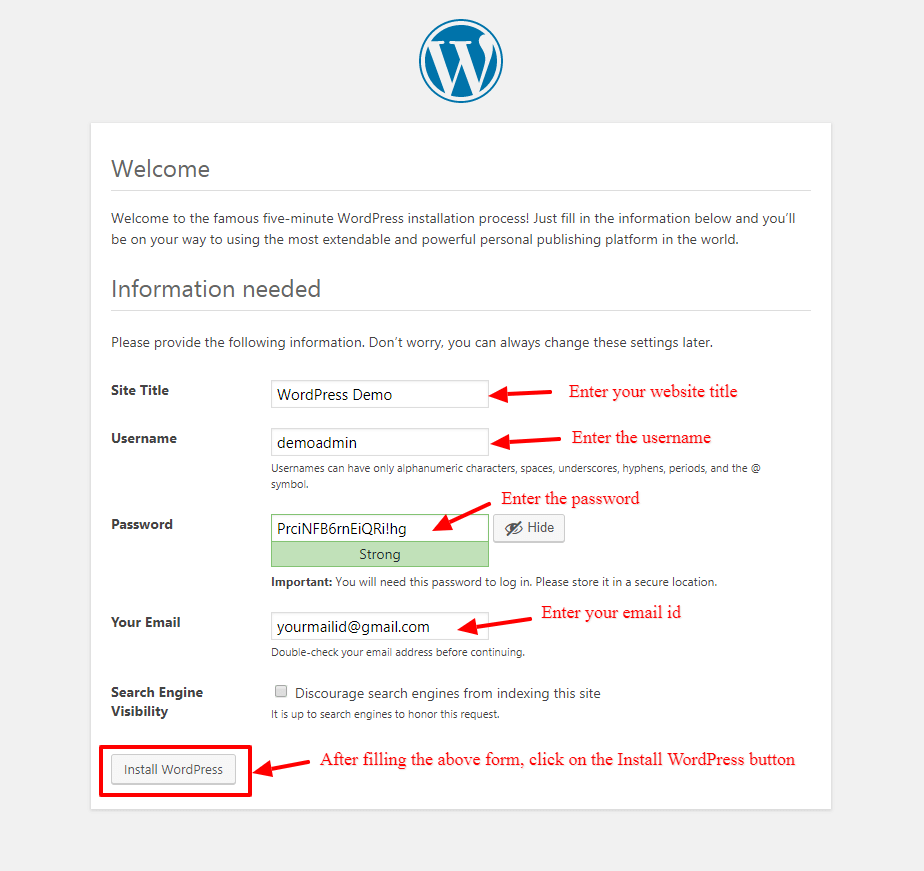
And once you click on the “Install WordPress”, on the next screen you will see the success message as “WordPress has been installed. Thank you, and enjoy!“
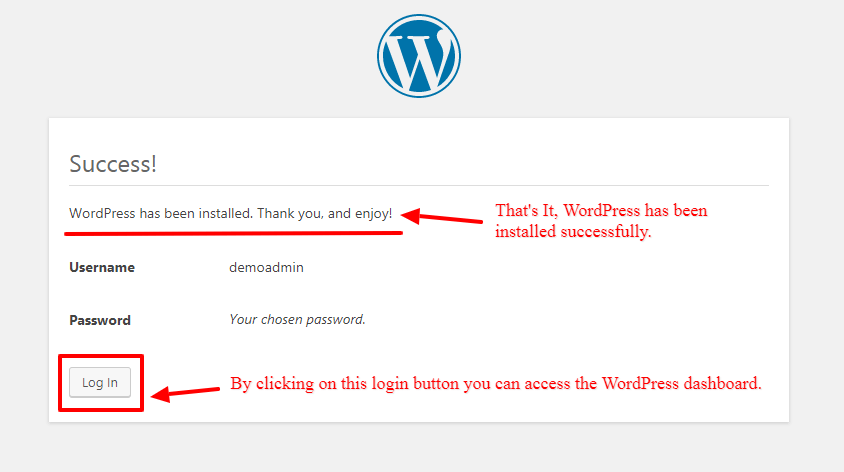
After clicking on the “Login” button, you will get the screen as shown below, you can also access this page via “http://localhost/projectname/wp-login.php” (Note: change your projectname in this url, if you have used any other one).
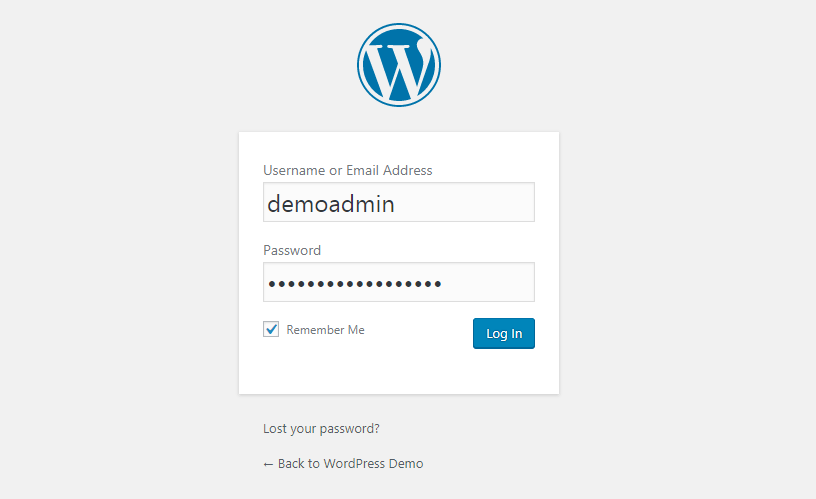
And after entering the username/email address along with the password that you created during the setup configuration. Click again on the “Log In” button. You will see the WordPress Dashboard as shown below:

To see the main site, just follow the URL: “http://localhost/projectname/“, you will get the default layout as shown below, you can also learn how to customize the frontend by installing WordPress themes and plugins. I’ll cover this in a separate article.
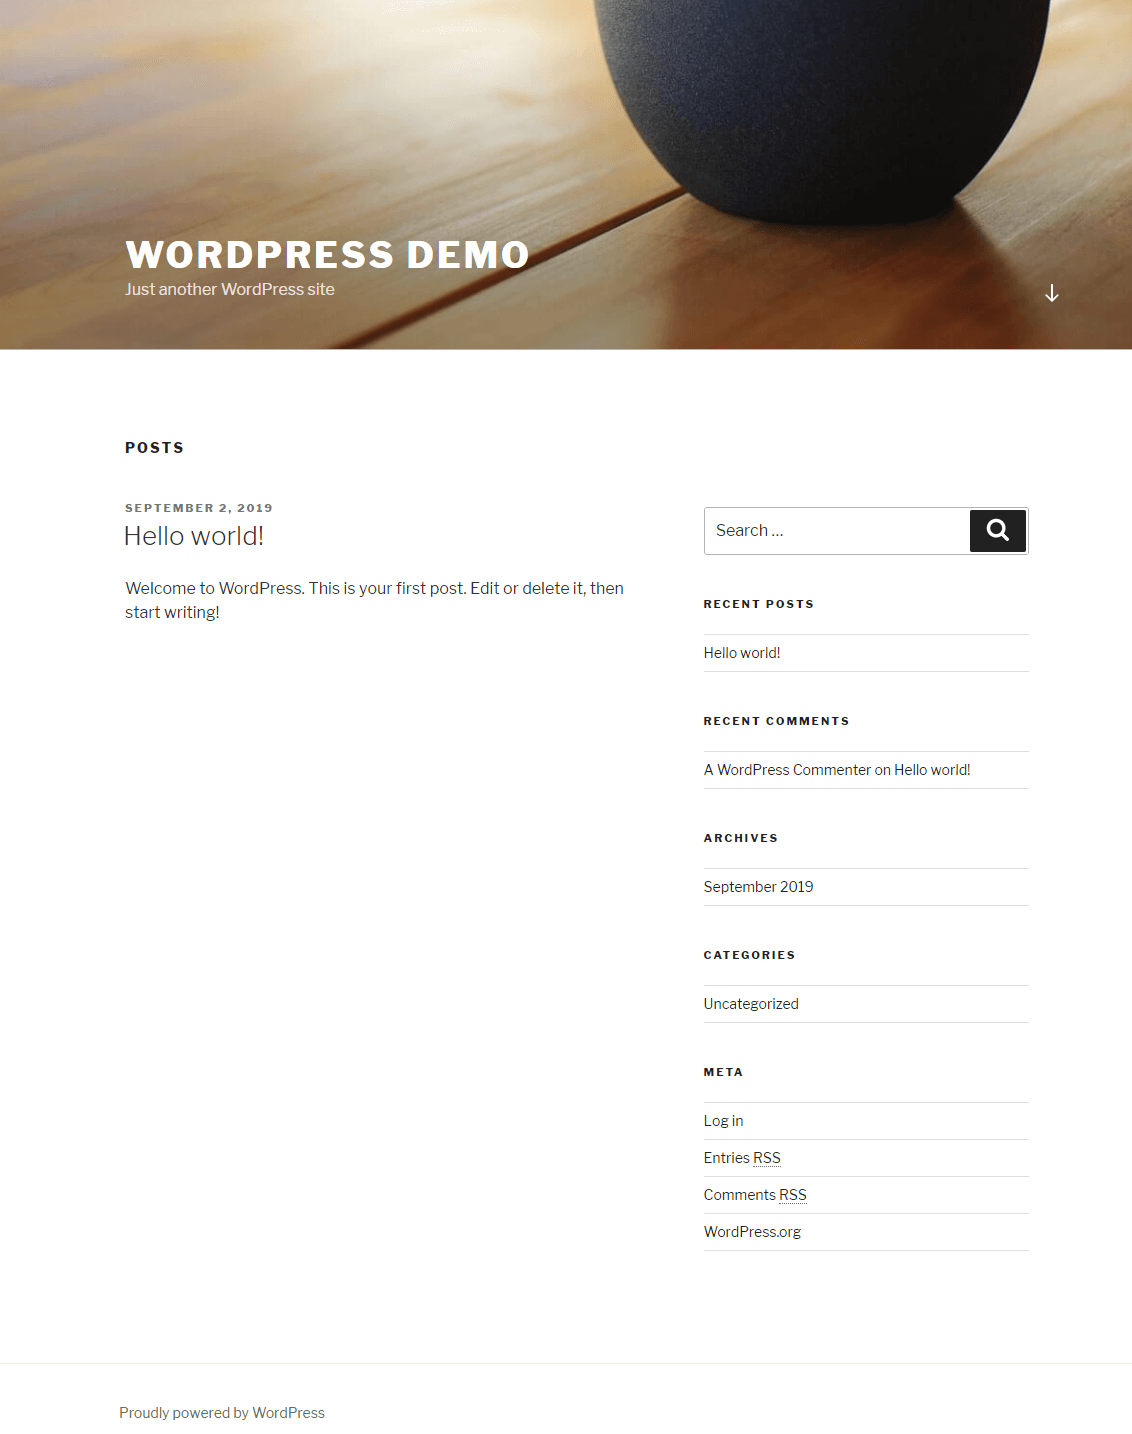
If you follow the above steps, I am sure you will be able to set up your first WordPress Installation on your localhost easily, without any problems. Thanks for reading this article!
All the best and Happy Blogging!
Was this post helpful? If so, would you consider sharing it with others who might appreciate it as well? Simply use the sharing buttons below. Thanks!


